Shock Absorbers 101:

Most bikers have NO clue what's going on inside their shocks, and no idea how to adjust them. That's OK if you're a gutter bunny -- you probably don't need shocks anyway. But if you're going to hit some real rock, adjusting your shock absorbers can make the difference between "terrified-newbie" and "god-on-two-wheels."

Shocks can do two things: (1) They let the wheel move up when it hits something, without forcing the bike and rider to take a similar violent motion. To do this, the wheel is suspended on something springy. This can be a metal spring, compressed air, or a rubbery substance (elastomer). The amount of springiness is called "preload." (2) The shock can control the speed of the axle motion, both when the wheel takes the hit, and when it rebounds to its original position. This is called "dampening." This is a second system in the shock -- usually a hole through which fluid or air is forced as the shock absorber moves. The size of the hole determines how much the shock resists shortening or lengthening.

The type of shock determines how it responds to changing conditions. For example, an elastomer shock will feel stiffer during cold winter rides, while a compressed-air shock will feel a bit softer when it's cold. Dampening increases with cold (the fluid gets "stiffer"), so the rebound of the shock will be slower in the winter.

Some shock absorbers have an additional feature called "lock out." This freezes the shock so it can't move. Why would you want to have NO shock absorption? Because it can make the bike more efficient during a long climb.

Air shock.
Air shock. When you hit a bump, it compresses the air.
Air shocks use compressed air for the "spring" in the shock. Adding air to the shock makes it "stiffer" -- it takes a bigger hit to move the wheel the same amount.

On this rear shock, air is being added through the high-pressure port. The red disc is the rebound dampening dial. It determines how fast the wheel moves after absorbing a hit. The blue lever is a "lock-out," which freezes the shock so the bike performs like a hardtail. The ring at the bottom is part of the "attitude adjustment." By turning the shock on the threads of the mounting, you can move the rear wheel up or down, changing the angle of the bike.

Air shocks use a schraeder valve to add air. But a bike tire pump can't generate a high-enough pressure. You need a "high-pressure pump" or "shock pump" capable of generating up to 300 PSI. The shock pump will have a gauge that tells you how much pressure you've put inside the shock. An air shock is usually lighter, and more expensive, than other types.
A shock pump has a pressure gauge.
A shock pump has a pressure gauge, so you can match the pressure to the riding conditions.
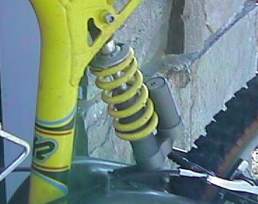
Coil shock.
Coil shock.
Spring shocks use a coil spring to absorb the hit. The shock is made stiffer (so it takes a bigger hit to move the wheel a given amount) by tightening the spring. 

In the center of the spring is the rebound dampening unit. Fluid flows within the shock absorber as it changes length. Increasing the resistance to flow increases the "dampening," so the bike isn't as "bouncy." (This shock does NOT have a lock-out. It's always working.)
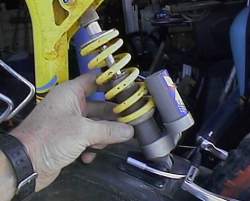
The disc at the bottom of the spring turns on the threads to control the length of the spring. With the spring shorter, it increases the preload, making the rear wheel more resistant to upward motion.Dampening is adjusted with a control on the fluid reservoir (the cylinder in back). Increasing the dampening slows down the motion of the shock.
Adjusting the coil tension with the ring.
Adjusting the coil tension with the screw ring.
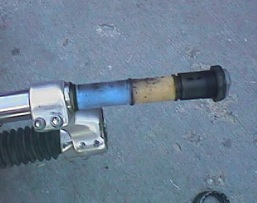
The guts of an elastomer shock.
Elastomer Shocks use a compressible rubber-like material, with one end pushing against a cap at the top of the tube, and the other against the bottom of the fork. The sleeve moves up and down within the larger tube of the bottom of the fork as the elastomer compresses and rebounds.

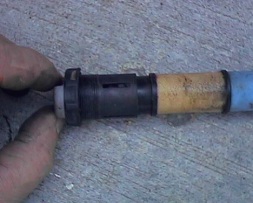
An elastomer shock can be made stiffer by pre-compressing the material. When the knob at the top is turned, it screws a second sleeve down, pushing the elastomer down and increasing the tension within the shock.
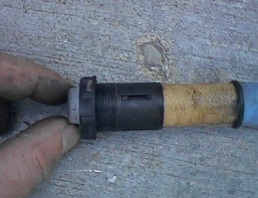
This shock is "soft." The inner sleeve has been dialed all the way back, so the ...
This shock is "soft." The inner sleeve has been dialed all the way back, so the elastomer has no pressure on it until you hit a bump.
Here the elastomer is pushed down, so the shock is stiffer. It's already partial...
Here the elastomer is pushed down, so the shock is stiffer. It's already partially compressed before you hit the bump.
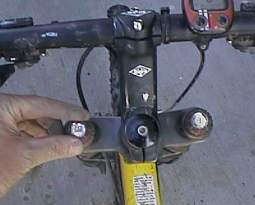
Double-crown front shock.
Many front shocks have separate units for "preload" and "dampening." On one fork, there's a spring or elastomer to absorb and rebound from the hit. On the other fork, there's a fluid or air dampening unit to control how quickly the shock "bounces."

On these shocks, the dial on one side controls the preload (bounce or stiffness). The dial on the other side controls the speed of motion (dampening). On this shock, the left side is dampening, the right is preload.

Servicing your shock absorbers
Check the piston, cylinder, and surrounding areas for signs of leaking shock absorber oil. If the shock is leaking, take it to your dealer. If you're unsure whether an oily spot came from the shock, clean it, then compress the shock firmly 20-30 times. Look for fresh oil.

Periodically, check the dampening by turning it up full. If you don't detect significant slowing of the rebound when you compress the shock, the shock needs service. It may be out of oil, or it may have an internal malfunction.

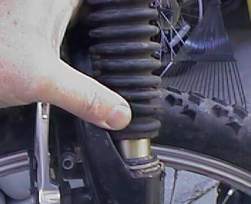
Turning the screw ring on a coil shock.
A shock with a boot.
If your shock came with a rubber boot, clean it out periodically. The rubber sleeve helps keep dirt out of the shock seal. The boot has small holes to allow air to move in and out of the boot as it compresses. Although these holes aren't big enough for big drops of mud, they will suck in trail dust. Eventually, this dirt will wear out your shock if you don't know it's there.

Clean off the outside of the boot with a degreasing wash. Now pull up the boot from below. Wipe off the boot mount. Clean the inside edge of the bottom of the boot sleeve with a cotton swab.

Pull down the top attachment. If your shock design has a boot that hugs the shock shaft, pull the boot away and stick a pencil into the gap. Now flush the inside of the boot with soapy water, compressing and squishing the boot to get the dirt out. Let it dry.

Apply a thin coating of bearing grease to the shaft of the shock. If your boot has a shaft-hugging top edge (as shown), run a thin layer of bearing grease around the inside of the top of the boot. Reattach the boot.
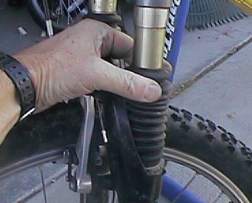
Shock with a boot.
Shock with a boot.
About every 25 to 50 hours of riding (depending on how dusty, muddy, and rough), you should lube the wiper (the part that cleans the stanchion as it slides into the slider). See our page on lubing the wiper . If you need to completely overhaul the shock, see our page on shock absorber cleanout .